Followers

Showing posts with label canvas. Show all posts

Thursday, April 3, 2025

DT Seguras Crafts: Believe in Yourself Mixed Media Canvas


Dear scrappers,

As promised my second design for the company: Seguras Crafts.

I started this canvas during a painting lesson by a friend of a friend of mine. It was supposed to be just a collage with simple painting on it:


But when I saw the  “Believe In Yourself” stamp, I couldn’t  help it and had to stop the painting and do stamping and mixed media instead. This stamp is perfect. The little messages are so inspiring and perfect for Mother’s day gift or for a nice card of encouragement.

I started by painting the background using turquoise and dark blue acrylic paint, the I added the pieces of paper with paper glue following roughly the wings outline.
Then I wanted to use the black and dark blue inks to stamp the “Believe in Yourself” sentiment, with the bad luck that I didn’t notice that my old black (CTMH) inkpad was damaged and falling apart. As you can see in the picture in the middle, the stamping was totally irregular even using books as support for the stamps… well what to do… I decided to fill in the words with some enamel accents by Rangers. I really liked this raised and shinny outcome. For the “in” sentiment I used the very light blue almost white nuvo drops. I also stamped around the hearts and starts:


For the next steps, I used Multi Medium Matte (Rangers) to seal the collage papers, and applied a layer of clear gesso (LiquiTex) to add some grip for the next layers. I wasn’t very happy with the light color of the nuvo drops, so inked them a little bit:


I wasn’t totally happy with my previous stamping job and still wanted to add the rest of the sentiments, which are a lot smaller, so I ended up stamping them on white tissue paper using black StazOn ink and add the cut strips with ModPodge:


I added color to the stamped harts using Deco Glitter marker and outlined the collage with a metallic acrylic marker. 
I still wanted to add more layers, so I sprayed white Dylusions ink, dried and sprayed randomly blueish Tattered Angels ink for added shimmer. It is hard to capture both effects with the camera: 


It wasn’t still shimmering enough, thus I felt inspired tHe Seguras Crafts’ Rhinestones In Aurora Gleam (Coming Soon) And Ocean Bliss and added them using glossy accents to the stamped starts, which were becoming almost invisible after the many layers:


I love love the shine in this canvas and I am sure that the person for whom (secret) I made it will feel inspired and her spirit lifted by this angels wings telling her so many loving and uplifting words of so much need self love.

I hope you join me in checking Seguras Crafts and following the other amazing design team members. 
And remember the team logo, “Together we create for mental health”

Keep checking my posts in the following weeks for more inspiring work,

Love

Vicky Tovar

I’m also joining these fun challenges:


lovetoscrapchallengeblog:.oltscb-172-anything-goes-ltscb-171

girlzcreativefunartofscrap: challenge-8


ANYTHING GOES POSITIVE WITH THE OPT. TWIST OF 

EMBRACING THE UNEXPECTED: 

MAKE A CREATIVE PROJECT YOU WOULDN’T NORMALLY MAKE

Although I have done mixed media projects in the past, this is my first time using more words of affirmation for a gift. 

Tuesday, June 27, 2023

CraftWell DT: Hello Sunshine Mixed Media Canvas


Hi, 

This is Craftwell. Currently, I'm spending some time in Galveston, Tx and decided to make a mixed media canvas as décor for our vacation home.

I used the sassy shell bag kit by Tonic, and since I was limited by what I brought, it was an easy choice for this cute canvas:


Steps:


First, I added some crumbled aqua tissue paper using Clear Tar Gel, Golden to a plain canvas. Usually, I use ModPodge for this step, but the gel worked just fine. Then, I used a Finnabair stencil to add some blue ink, ColorBox/ Graphic45 to the dried tissue. In the mean time, I died cut the shell images I wanted to used using my SNAP and the specialty cardstock included in the kit.


Then, I did the fun part of spraying with gold sparkle spray the wooden mermaid clip, and some punched sand dollar pieces. I also added some Chrystal Drops accents to the wooden shells, which I also sprayed when the drops where dried.
Finally, I stamped the sentiment on watercolor paper using archival ink. I distressed the hand-tore edges with the sparkle spray using a brush.
I tore some leftover sand motive printed paper, and added the strips to the bottom of the canvas. When dried, I added some clear Chrystal drops accents to represent waves.
I added a net wrapping I had from some fruits, and used glossy accents glue and 3D zots to glue every piece to the canvas. Once assembled, I added randomly Chrystal Drops in blue and clear, and once the dried, I sprayed randomly with the gold sparkle spray, and added some sequins, Simon says stamps using clear gloss.

Some close-ups:

Here are some short videos showing more details:


Here is how the Mermaid clip works for adding a picture:


I am very happy with the final mixed media canvas and put it on a wall already.

Craftwell Tools: 


SNAP die cut machine

Other Companies:


Clear Tar Gel, Golden
Aqua tissue paper
Watercolor paper, Hero Arts
Sand motive printed paper scraps, various companies
5x7 Doller Tree Canvas
Black Archival ink, CTMH
Bon Voyage Blue ink, ColorBox/ Graphic45
Sparkle Spray Cream Gold, Nuvo
Chrystal Drops Midnight Blue, Nuvo
Chrystal Drops Clear, Nuvo
Bindweed Wallpaper stencil, Finnabair 
Sentiment Stamp, Paper Wings Productions
Sand dollar punch, Martha Stewart 
Specialty sticky handmade paper
Sequins, Simon says stamps
Glossy Accents, Rangers
3D Zots


 I hope you enjoy it this fun project and please follow Craftwell as well.


Stay cool this hot June

Vicky Tovar


Some Challenges:


Strips of paper sand  motive printed paper scraps, and sequins


vacation


Tuesday, May 31, 2022

DT CraftWell: Lovely Canvas Wall Hanging


Hi, 

This is my next post for Craftwell. 

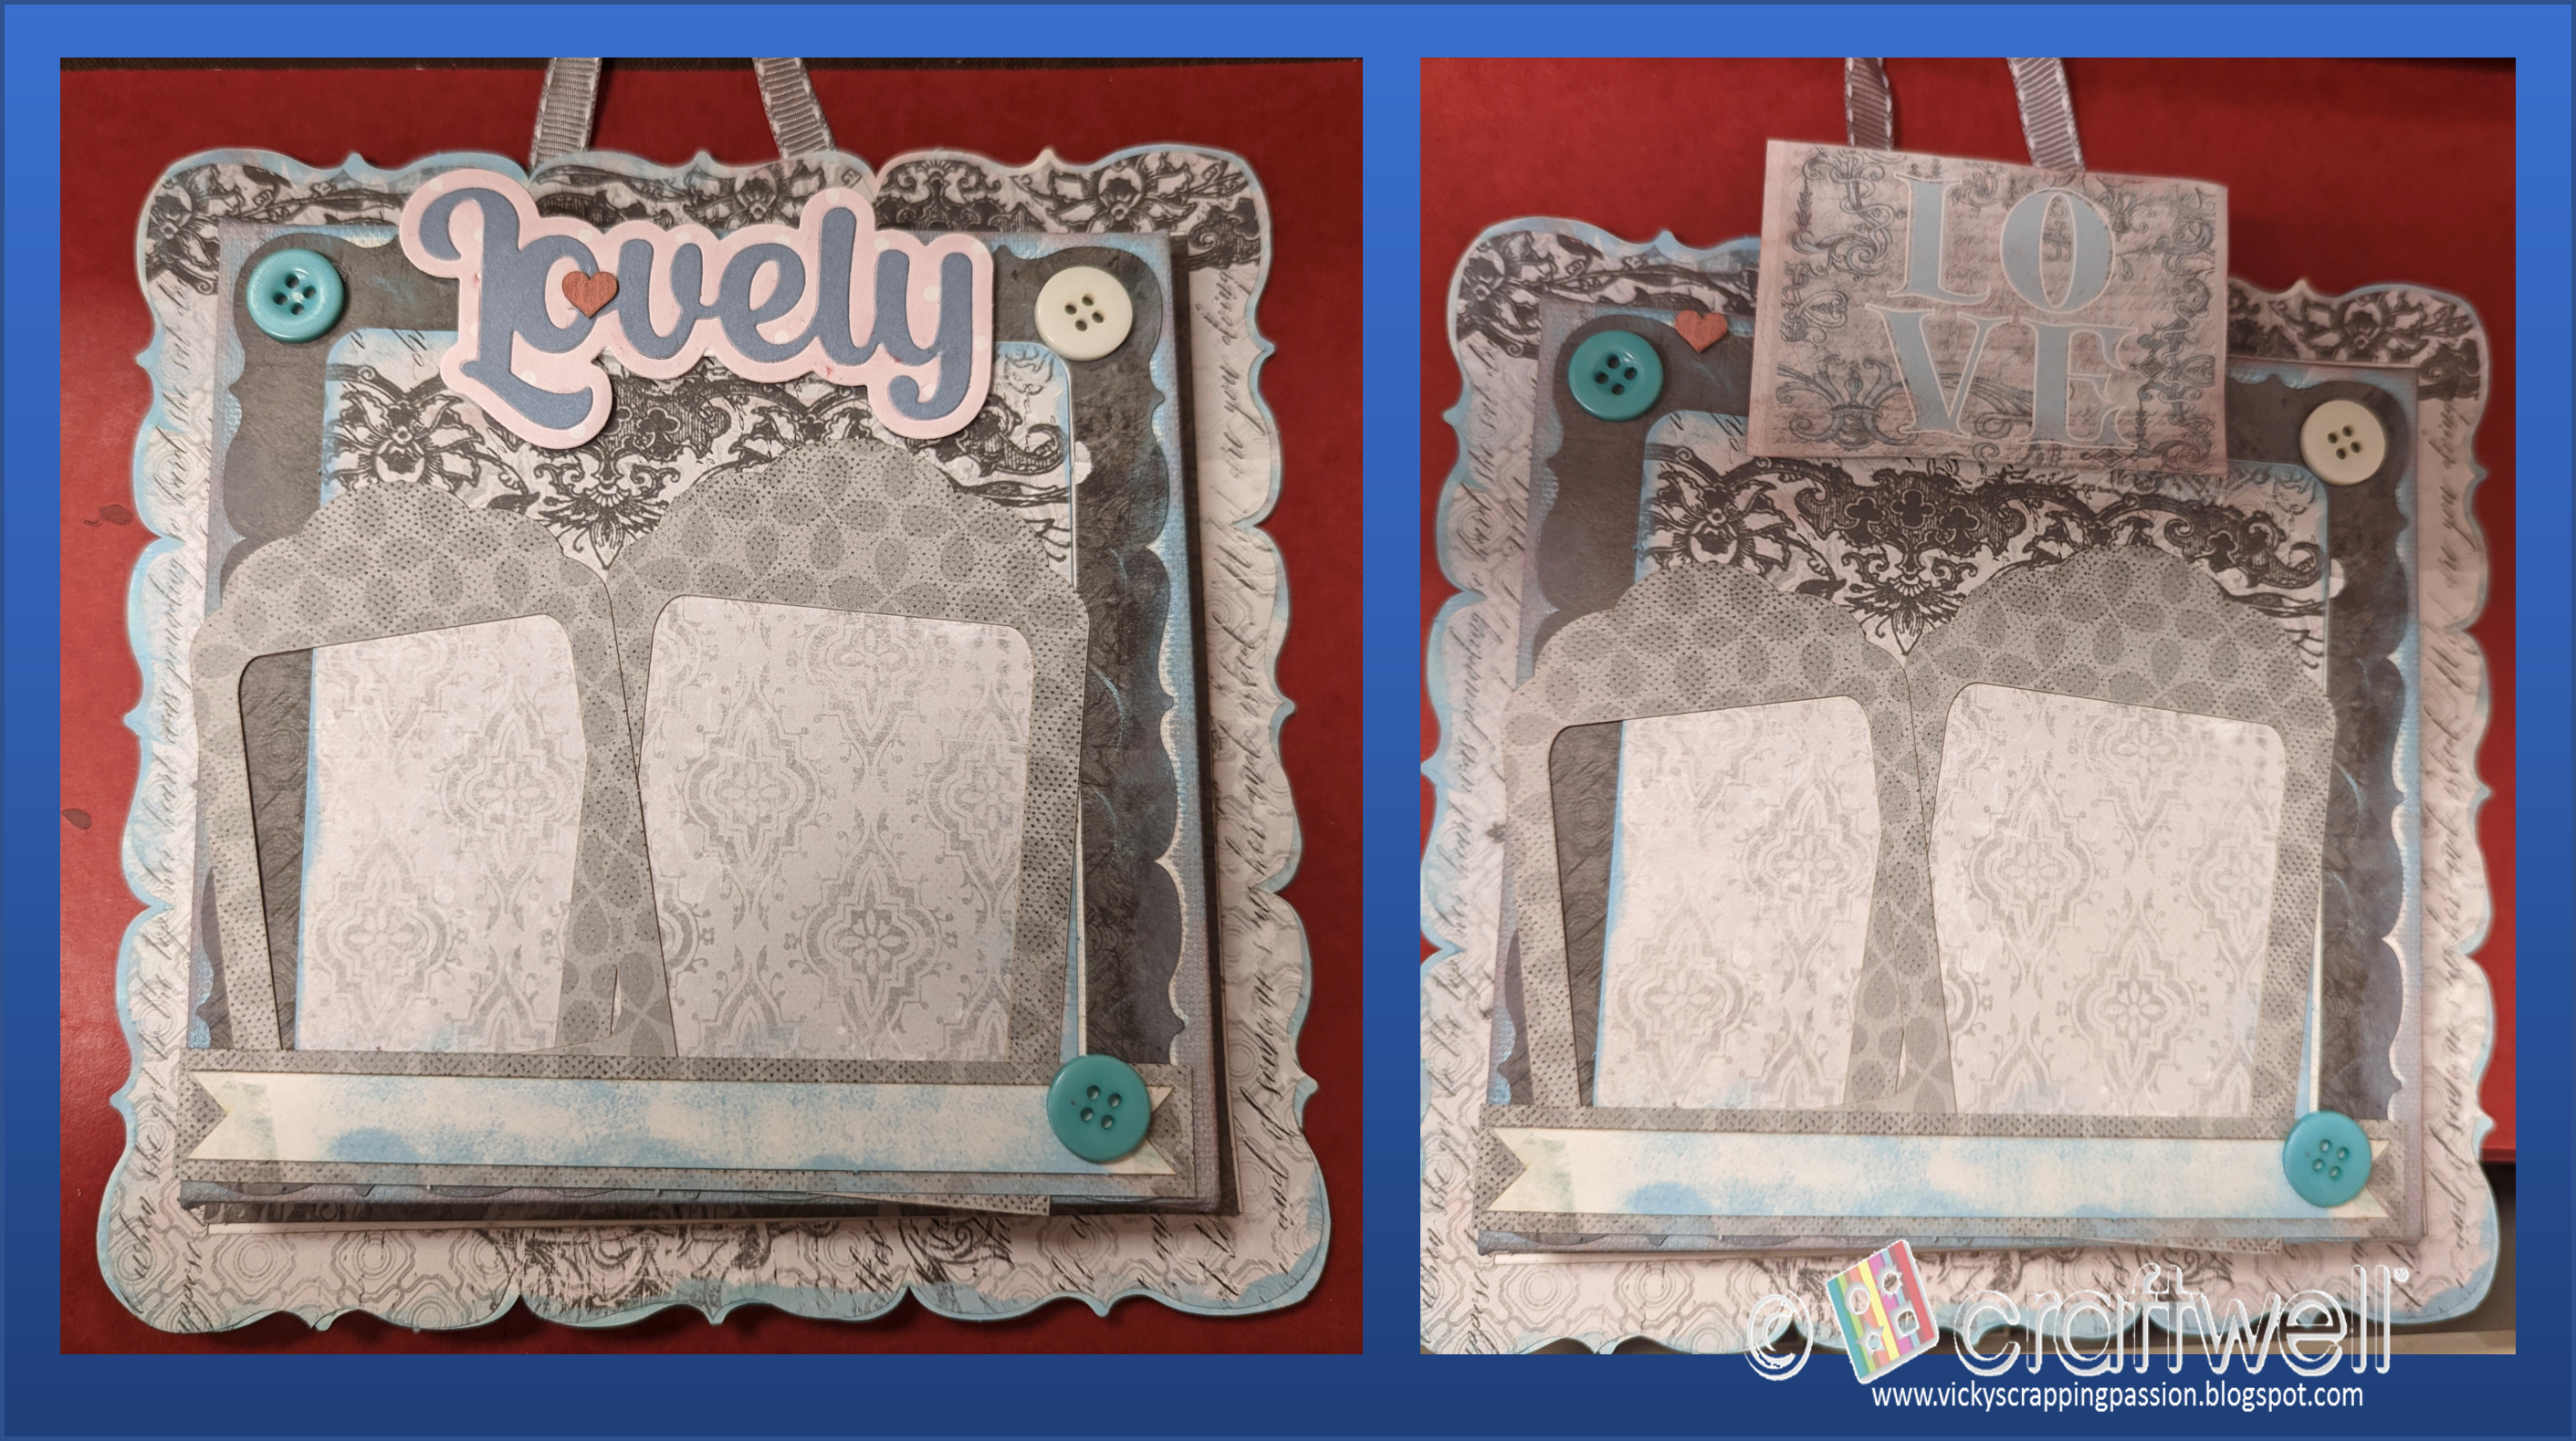
For this project, I used a decorated canvas from Quick Quotes. My daughter went with me to one of their fun whole day workshop and we bought this kit to decorate later on. My daughter did an amazing job. I was about to donate some of my sample albums and found again. I wasn't completely satisfied with the title, so I decided to use the sentiment die from SCT. It had just arrived in April, so I was dying to play with it.

Here you can see side by side the change it made in this lovely canvas. Hahaha, pun intended:


I used some printed pink paper and cardstock from the "Lovely" card kit from CTMH:

I had asked my daughter to glue only the bottom part of the picture frame dies cuts to let people add pictures behind. I added some double side tape on the top without removing the backing:


This kind of sentiment die cuts are wonderful to spice up any project, and super easy to cut using the snap.

Craftwell Tools: 

SNAP die cut machine

Other Companies:


SCT April Sampler
Dies:  Lovely part of the sampler, SCT
Quick Quotes canvas kit
PowerPuff chalk ink
Double sided tape
Foam tape
QTMH blue and pink printed paper (Lovely kit) what a coincidence...

 I hope you enjoy it this fun project and please follow 

Craftwell as well.

Vicky Tovar


Wednesday, April 18, 2018

PWP DT: Bluebonnets and Butterflies Canvas

Hi Scrappers,

This is my post PWP, and the Aviary.  I modified a Canvas kit from Quick Quotes with wings-cling-stamp-set, flowers-cling-stamp-set, and  the wildflowers-cling-stamp-set:


I used:
wings-cling-stamp-set, flowers-cling-stamp-set,  PWP

Moments like this, Canvas Kit, Quick Quote


In short, I distressed the die cuts using the powder puffs mocha mama. I added some pearl watercoloring in shades of blue. Then, I added some stamped sentiments to the flourish die cuts and to the heart cut outs using powder puffs or distress oxide inks. For the butterfly die cuts, I stamped the wings using distress oxide. I also inked the edges of the canvas. The rest, I just followed the instructions of the kit. For more details, here is the SnapGuide with more instructions.

Here some closeups:


I love the details the butterfly wings stamps add to these die cuts.


I also added some blue watercoloring to the big butterfly overlay. It blends everything together with bluebonnets in the pictures.

I hope you enjoyed my canvas.


I'm participating in the following challenges: